Showing posts with label Clothing. Show all posts

Sunday, 15 March 2015

Rainbow Circle Dress using a T-shirt

Today is smalls birthday and Mothering Sunday so Daddy has to wait on us hand and foot, we are definitely spoilt today. 

Isn't it very annoying when you buy clothing a few sizes up and it gets to wearing time, you pre-wash them and they shrink...then you cant find the receipt or remember where they are from. So sewing machine to the rescue. 


Plus little monster needs more dresses, don't know how she grows to quickly! I'm afraid I haven't got any pictures of her wearing it because Squiggle has been renamed Miss Dot-to-dot, got to love chicken pox. 

What you will need.... 
 
  • T-shirt
  • 2 types of fabric 
  • One pair of jeans (or 3 types of fabric)
  • Large sheet of paper or lots stuck together
One
First make a template for a circular skirt. I used a variation of this fabulous tutorial
My Maths (who though you would need an A-level in maths for sewing) measure the waste of your child, Squiggles is 20 inches. Add 6 inches to your waist measurement (for the gathering) and divide it by 6.28.
In my case 
(20+6) / 6.28 = 4.14 inches.

Following the instructions from the tutorial, measure down your length on your paper, and using either a protractor or string tied to a pencil draw a 1/4 circle. 


Measure from about 1 inch under your child's arm pit to your desired length, Squiggles was 11.5 inches, and add 1.5 inches for the hem and join. Measure from your previous 1/4 circle down by your length and draw another 1/4 circle. 


Its massive the smaller template is standard size I made a few months ago. This skirt is going to be lovely to twirl in.


Fold the template into 3 with 1 larger and 2 smaller and of even size. Cut your template into 3 and we are ready to go. 


Two
Time to start cutting out the skirt. You will need 4 of each of the 3 fabrics, remember there is no seam allowance on the sides just the top and bottom so add 1/2 inches to each side. 


When the cutting out is done you should have something that looks like this, lovely fabric, the checked are my largest section. 


This is what left of the jeans hahaha perfect for the summer!!


Three
Attach the pieces together with a 1/2 inch seam and then zigzag the edges.


So that 1/4 of the skirt looks like this. Repeat till the whole circle is completed.  


I think it looks very pretty maybe I need to make a floor pillow like this soon.


Four
Cut your t-shirt at 2 inches below the arm hole. Loving the fact my t-shirt has strips made life so much easier.


Five
Gathering - set your sewing machine to its longest stitch and tension to its highest positive (mines +3) then stitch 2 rows around your skirt. Don't over stitch the ends and leave long ends.


Matching up the t-shirts seams to the skirt and pin together on either side. Using the t-shirt side as a size guide pull on the bobbing threads to gather the skirt.


Once your happy with the gather pin the top and skirt together and stitch at 1/2 seam line. You might need to remove the gathering stitches once stitched.


Six
Fold the top over the join by 1/2 inches and stitch though all layers so make a pleat.


Seven 
Hemming - Because of the bulk of the denim I didn't use an enclosed hem just zigzag edged the skirt folded it over and double stitched it. 


And we have a finished dress with a pleat at the waist and and circle skirt.


Now I have to think of things to do with the other 2 t-shirts....

Sunday, 15 February 2015

Attaching sleeves to lined bodice

My little cutie needed a dress for her (soon to be, when her mother gets off her bum and organises it) godmother's wedding.


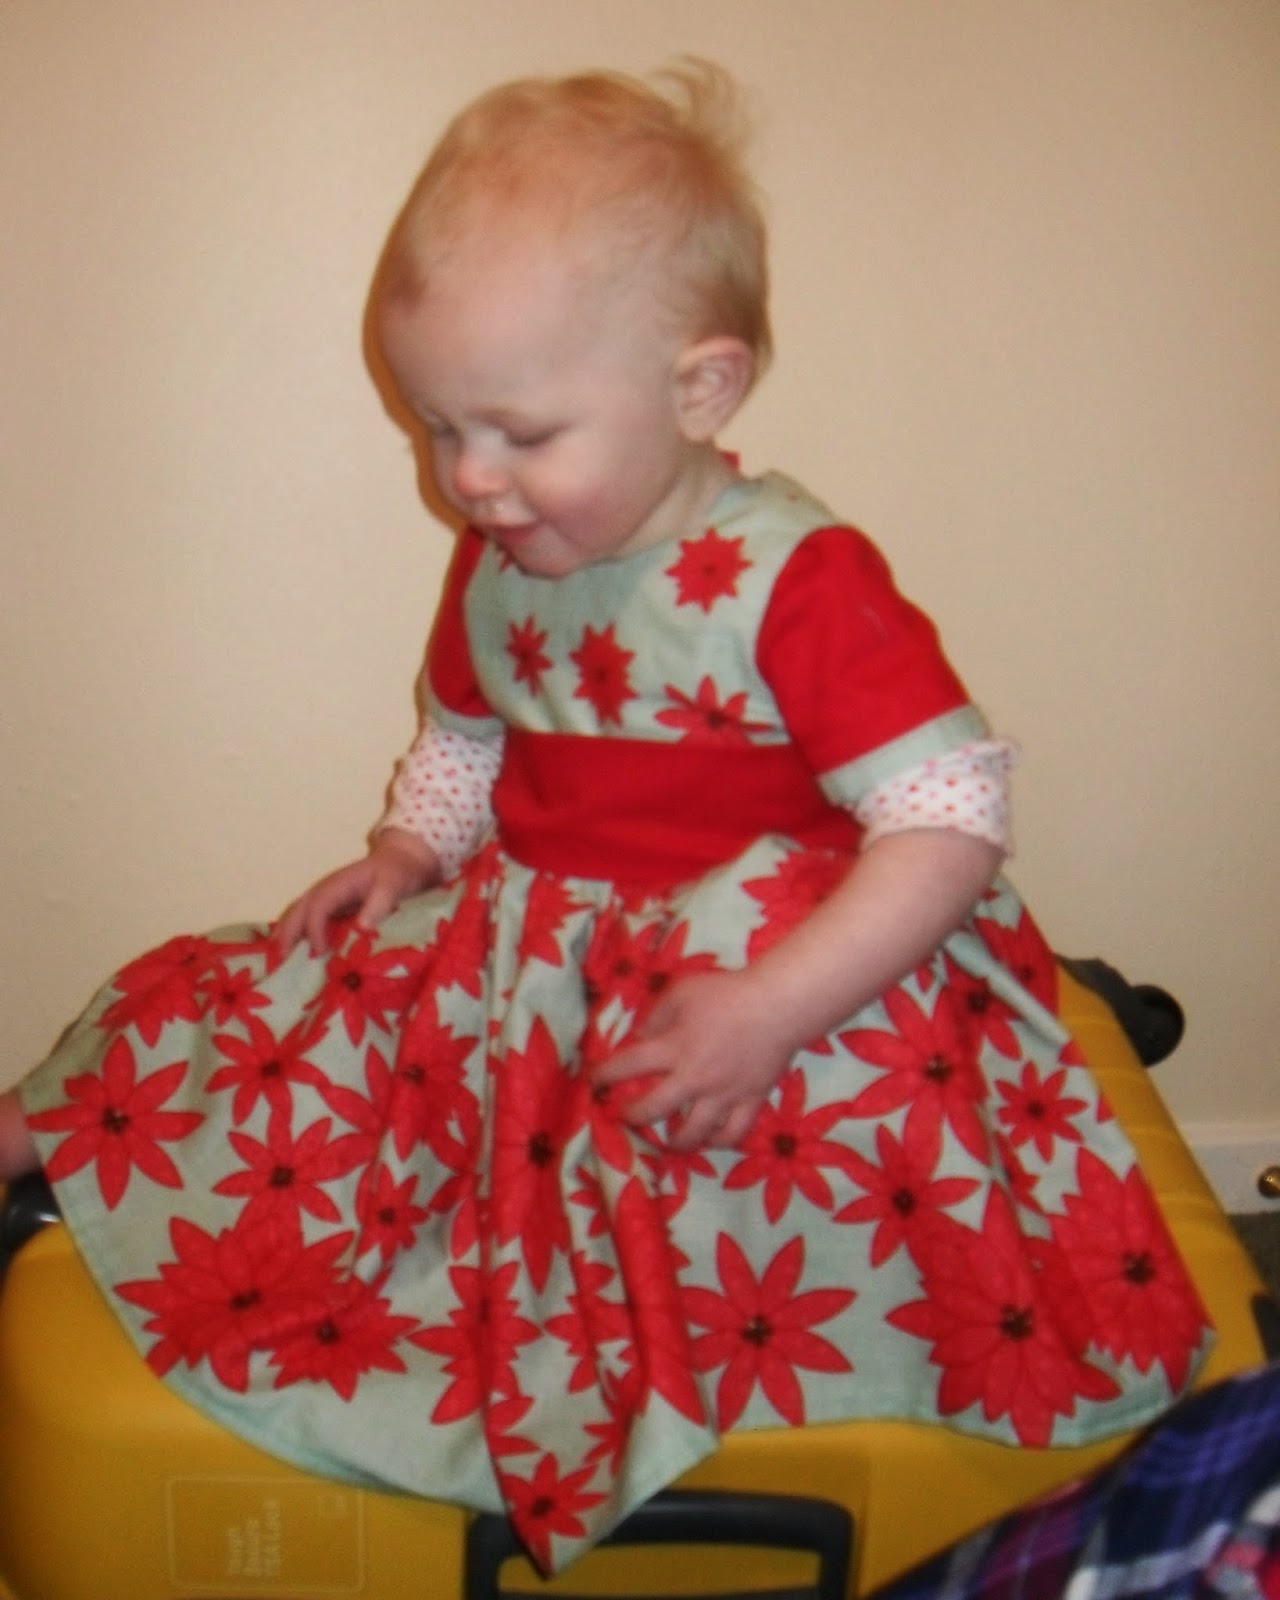
And she manages to be cute for pictures!!

I used Cottage Mamas free party dress pattern size 18 months but it is February so wanted to add sleeves. I really struggled to find a tutorial that attached sleeves to a lined bodice and I really like the idea of hiding all the naughty bits. Changes I made to the pattern where to replace buttons with a zip and removing the bottom band.

Now I will admit the final bodice was attempt 2, attempt 1 was thrown in the corner of my sewing room in disgust, and  I asked a friend with more experience for pointers. So I hope this tutorial helps someone else and less fabric gets wasted. 

One Stitch the shoulders of your bodice together for both your outer and lining fabric and press open your seams. 


Two You should have 2 sleeves, outer and lining of the bodice.
Prepare the sleeves by gathering the top if needed. Set your sewing machine to the highest tension and stitch length to the longest. And stitch 2 rows of straight stitching, leaving long ends and don't over stitch either end.

My seam allowance was 1/2 inch so both my gathering stitches where just inside this, pull on the ends and gather your sleeves.

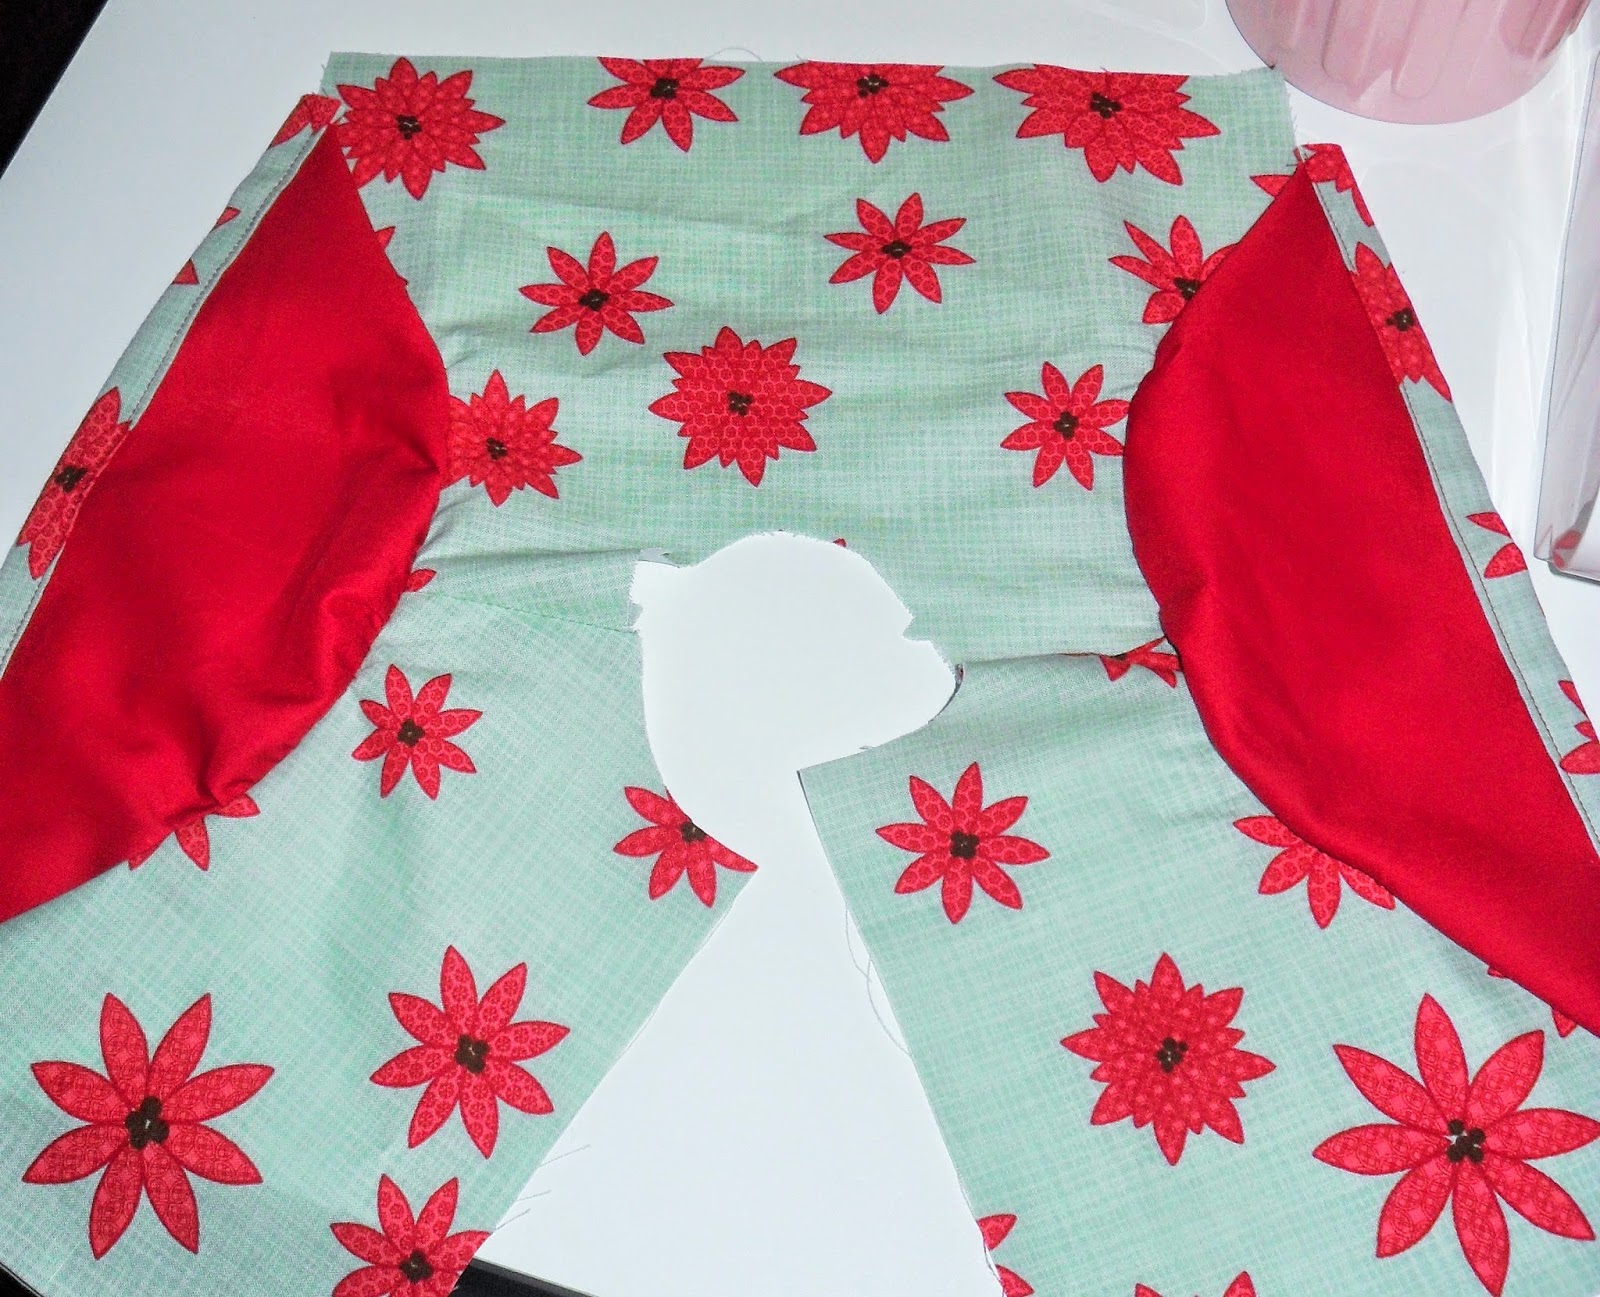
Three Pin your sleeves to the outer, right sides together. Leaving a gap at either end the same size as your seam allowance. Once attached your outer should look like this.


Four Pin your lining to the front and stitch around your arm holes leaving your seam allowance at either end, also stitch around the neckline. It looks a little bulky because of the sleeves but be careful not to catch the sleeves in the neckline, armholes or back.


I'm putting an invisible zip into this dress so have left the back open. Notch or clip around your seams and turn them through the shoulders. Press the bodice till you are happy, if it doesn't look right take more bulk out of your seams. 

Five Sew the sleeves into a tube right sides together, you can use a French seam is you want them to be tidier. I stitch mine together and then zigzagged along the seam.

Six To close up the underarm, match up the lining and outer and sew the opening closed. Notch the seams and press open and follow the rest of the pattern instructions. 


And voilĂ  you have a beautiful dress. Please post pictures of your finished dress so I can see your pretties :).  


Friday, 16 January 2015

Denim Shorts with waist band Tutorial

Theses shorts are lovely and easy to make and can be made in most fabrics. I started with an old pair of the husbands jeans, I am very lucky because he is very tall so his clothing has lots of fabric, I have already used them to make dungarees.


You will need...

  • Your fabric of choice for the outer and waist band. 
  • Elastic (I use 1 inch elastic)
  • Sewing stuff 
  • Paper 
  • A pair of shorts that fit your child well. 

One
Fold the shorts in half and draw around them. Then add a 1/2 inch seam allowance. If your shorts have an elasticated waist remember to leave more room at the top.


Two
Fold your fabric in half and cut out 2 pieces on the fold for the legs.


Three
For the cuffs cut 2 pieces the same length as the the legs on the fold. Finally using your contrasting fabric cut the inside of your waist band, as I am using 1 inch elastic I cut mine 2 1/2 inches wide the length with come later.

You should now have 5 pieces for fabric. At this point I was running out of usable fabric lol.

Four
Iron the cuff strips in half length ways
And pin them to the bottoms of the leg fabric on the wrong side, with the opening at the bottom.

At this point my delightful squiggle got shut herself in the bathroom and after emptying everything in sight got very upset that the door was closed, I was enjoying a moments peace.

Sorry, Sew together along the bottom, you can zigzag along it to stop fraying put as it would be covered I didn't bother.
Fold over the cuff as shown and press, then top stitch down.


Five
Pin your legs right side together along the curve and sew (as shown by the red lines). Finish edge with zigzag stitch.


Six
Pin your crotch together like so (hint: try to line up the seams on the inside). Mine are really small as they are on 12-18 month shorts so don't be worried if yours have longer legs.
Then stitch, cut off any excess and zigzag edge.

Seven
Now for the waist band, this is my preference for creating a waist band.

Start by measuring around the waist of your shorts. Mine is 60cm. So My strip is 63cm long and 7cm wide. DON'T FORGET your seam allowance as extra length when cutting so you have a long enough piece of fabric.Create a loop of your contrasting fabric


With short and waist band right side together, Stitch around the top of the shorts.


Eight
Iron a fold in to the bottom of the waist band like so.


 Iron down the waist band ready for top stitching.


Nine


Chose a colour cotton which compliments your shorts and top stitch around the waist.


Ten
Leaving enough space for your elastic, stitch along the bottom of the waist band, leaving a gap at the end to get the elastic in. You can put a small tag of ribbon in the waist band so small people and Daddy's know which is the back.


Eleven
You now need your small person and elastic. Measure around your childs waist in inches and subtract 2 inches for the length of your elastic, mine is 17 inches.
Put a safety pin on one side of your elastic and a normal pin on the other end so is doesn't disappear into your shorts. And thread in through the gap in your waist band.
Stitch your elastic together using a zigzag stitch.
Finally close the gap on the back of the shorts.


Keeping my small person still for a decent picture is almost impossible.


Sit back enjoy a cup of tea.