Showing posts with label Pattern. Show all posts

Sunday, 29 March 2015

Fabric phone wallet

For Christmas this year I bought the man a phone wallet case for when he goes away on exercise (oh the joys of being a military wife you start to use the lingo) so he didn't have to take his wallet and his phone had a bit more padding. Well it was a major success and is lasting very well, but I bought myself one and it was rubbish lasted a month and a half. But in that short time it changed my life, sounds over dramatic but I always forgot my purse, when we went out as a family he always had his wallet so I never remembered it. Now I decided that I would try making one, I found this tutorial on Pinterest but it didn't fit my requirement so time to make my own.


In the template I have included 3 ideas for the flap but get adventurous, what about elastic with a ruffle on or a button with a loop. This template is for an iphone 5 but can adjusted easily.

What you need...
  • Fabric as many as you fancy I used 2. 
  • Heavy iron on interfacing 
  • Magnetic purse clasp
  • Cheap plastic phone case
  • Strong glue...I used araldite 
  • Coordinating embroidery floss
  • Template 
Fabric to be cut out...
  • 2 pieces for fabric and interfacing  6.5 x 6 inches 
  • Back of the card holder and interfacing 6.5 x 3.5 inches
  • 3 pockets 3 x 3.5 inches
  • 2 fabric and interfacing for flap/clasp 
* these measurements all include seam allowance, seam allowance is not included in template 

One
Iron on all the interfacing, I also added thin interfacing to the top of the pockets, for a bit of extra support.
Fold over the tops of the 3 pockets by 1/4 inch and stitch.


Two 
Place the first pocket 1 inch down from the top of template and stitch 2.5 inches down from the top of the pocket (if this isn't clear look at measurements on template). 3/4 inches down from first pocket add the second pocket and stitch along the bottom 2.5 inches from the top of the pocket. Repeat for 3rd pocket but DO NOT stitch.

HINT - Transfer all measurements from template onto inside fabric using a vanishing pen or something similar. 


Three
Fold and press under the right side of the pockets by 1/4 inch then stitch down the side.


Once stitched trim off the excess for things don't get court under it.


Four
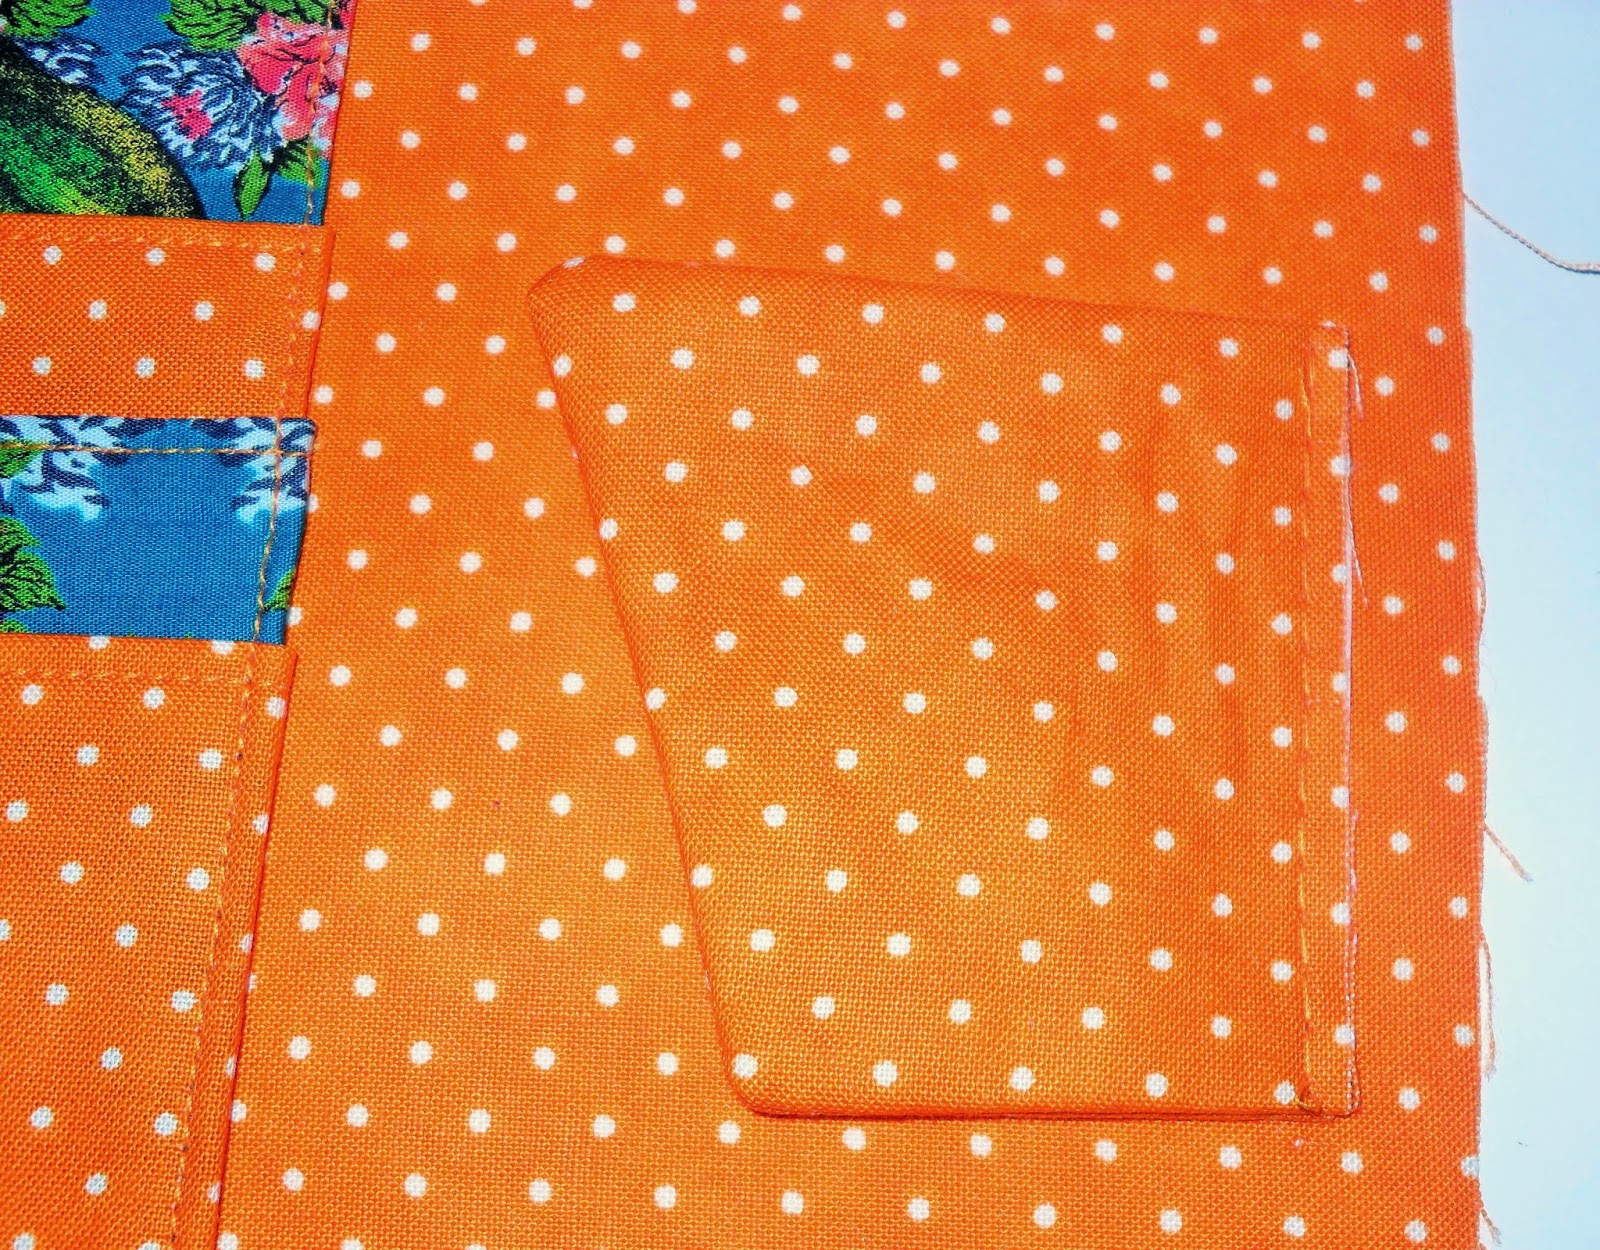
To make the flap stitch 2 pieces of fabric together using what ever design you want. Clip the edges, fold out and press. If you place your flap on the inner fabric as shown the side facing in is the side that the clasp needs to be attached to. For my clasp I just need to make 2 small holes in the fabric.



Five
Baste the pocket and flap to the inside fabric in the seam allowance (basting means set your stitch to its longest length and sew, meaning the stitches are easy to remove).


Six
Put the thicker side of the clasp on the outside of the fabric (if you place the inside and outside fabric next to each other both sides of the clasps will be on the same side, mine is right side).


Seven 
With right sides of the fabric together stitch around leave a gap so it can be turned the right way around. Clip around the edge, turn out and press. 


Eight
Hand stitch the gap closed and we are ready to play with glue...


Nine
Stick on the phone case and allow to dry. Finally cut around the hole for the camera and stitch around with coordinating embroidery floss.


And you have a phone wallet that's totally your own.


Thursday, 26 February 2015

Dribble bib DIY

I have been sitting on this one for a while because I couldn't get my scanner working for the template but here you go...

I don't know about other little people, but mine is like a waterfall of dribble (and usually snot) when she's teething. Plus a coordinating dribble bib looks very cute! 
Dribble Bibs are quick and easy to knock up with very little time and fabric, plus they make great gifts for a new baby.


What you will need......

  • Cotton fabric for the top 
  • For the lining I use muslin cloths that have got stained, other suggestions are knit, terry cloth or flannel.
  • Template
  • 1-1.5inch of Velcro or Poppers also called snaps
  • Contrasting thread 
  • Pins
  • Fabric pencils/Vanishing pen
  • Scissors 


The top fabric is the sleeve of an old tshirt that has been stamped with fabric paint. Fabric paint is so much funnnnnnnn.


ONE. Download the template and cut out the top fabric and lining fabric, remembering to leave the seam allowance.


TWO (If your using Velcro) Attach one side of the Velcro to the right size of the top fabric near the corner. and in the same place on the lining fabric attach the second bit of Velcro
.


THREE Pin the 2 fabrics right size together, then sew around it leaving a 2inch gap at the end, so it can be turned the right way out.

FOUR Trim the corners makes it easier to turn out. Once turned give it a quick press (careful of the Velcro) and hand or machine sew close the gap.


FIVE Stitch around the outside to make it lay flatter and pop it around your little persons neck.


SIX Sit back make yourself a cup of tea and enjoy not having to change their clothing every 10 mins.

One happy Squiggle!!

Have you spotted the dress made from this fabric!?! I will write a tutorial but I completely forgot to take picture when I made that one. Fail

Mine cost a grand total of a bit of thread. Recycling at its best!

For other ideas on how to personise your dribble bibs pop over to my Pinterest. http://uk.pinterest.com/k8efrew/dribble-bib/

Have a lovely week xx

Friday, 30 January 2015

Simple a-line dress with contrasting fabric

I don't know about anyone else but I find that dress become too small long before squiggle has grown out anything thing else of that size. Which of course I have never managed to notice before we travel to see grandparents and that cute dress that I wanted her to wear is to small!!!
Now I will give you squiggle is tall (91st percentile) but she's only average weight. Anyway so I have been making her dresses. And here is a lovely simple one.  

 
`
Heres the up-cycling bit making it nice and cheap. I am using a pair of mens suit trousers which I have washed and tumble dried so there is no shrinkage later.

You will need...
You fabric or trousers 
Fabric for contrast 
Buttons 
Thin elastic or ribbon  
Sewing equipment 

One 
I created an a-line dress pattern using one of squiggles t-shirts or use a bought pattern. 
This is how I draft mine. 

You need...
A t-shirt that fits her well
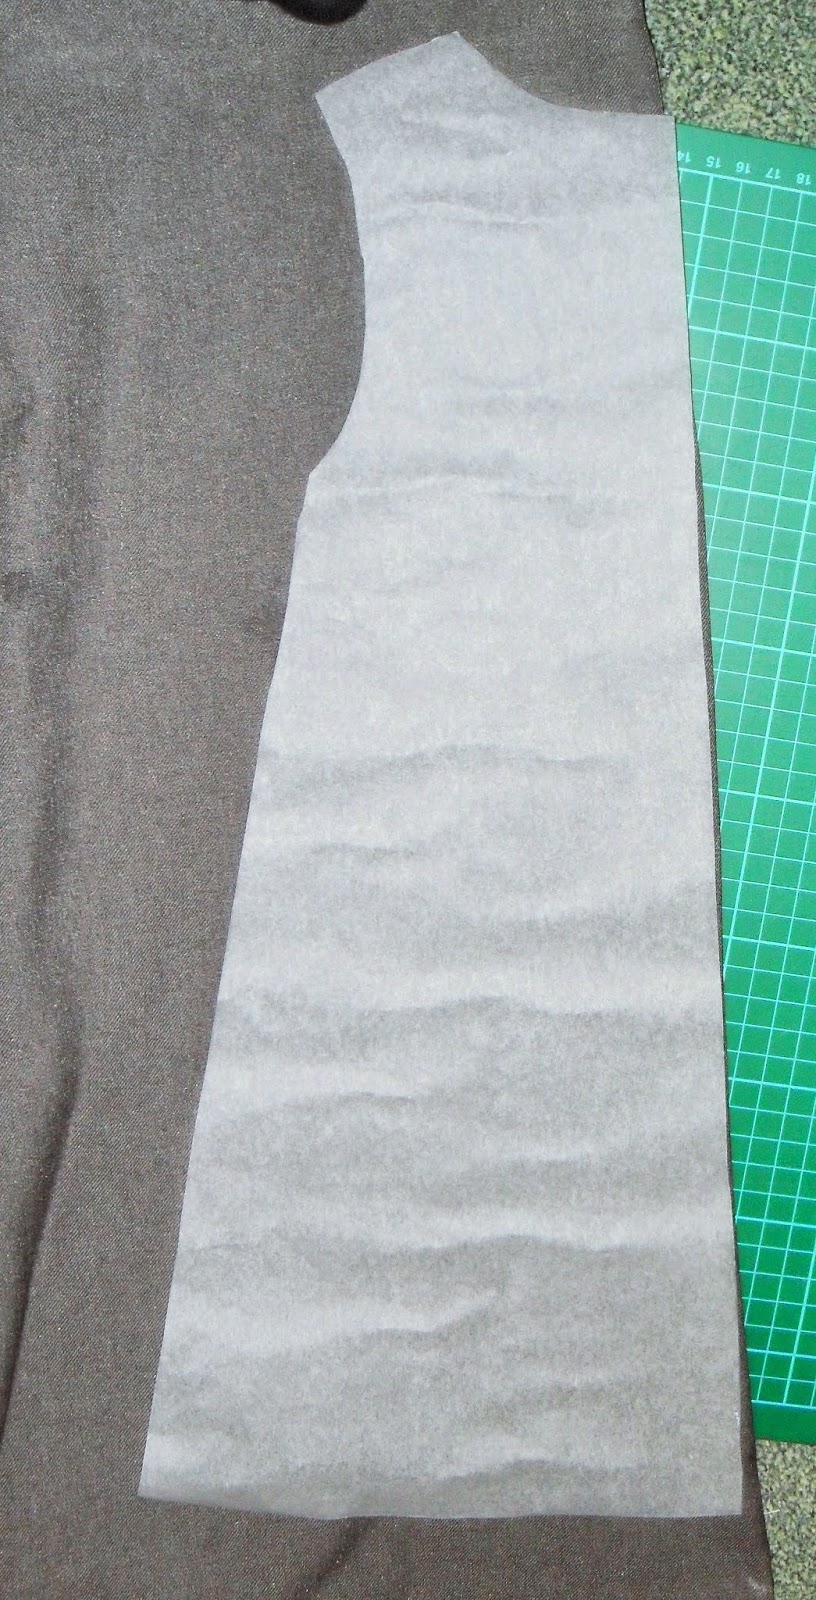
Some drafting paper (I use supermarket own grease proof paper, it's see through and can be ironed) 
Pins 
Ruler
Cutting mat 

Fold a t-shirt in half and place on the grease proof paper on top of your cutting mat. Then stick pin into all the key points around your t-shirt. Make sure you put a few pins along the curves so they are easy to follow. Then take your t-shirt off and draw in your pattern following the in holes. Finally extend the bottom of the t-shirt to dress length, or use an existing dresses length.


Two
Place your dress on the fold of your fabric and cut it out. DON'T FORGET  THE SEAM ALLOWANCE. One for the front and one for the back, you will know the difference because the front is lower.


Three 
Then using arm holes to sketch out a sleeve pattern and measure the length of your t-shirt to get the length of sleeve pattern.
Cut the 2 arms on the fold.


Four
now you should have a front and back and 2 sleeves (you will need to cut out pockets later so don't throw away your extra fabric). I zigzagged around all my pieces, except the back, as they are all ready fraying.

Five
Split down the seam on the back piece about 3 and 1/2 inches. Make sure you stitch over the bottom as it doesn't carry on splinting. you will need 2 inches of thin elastic or ribbon (use more for a larger button). Stitch it into the split about 1 inch from the top and top stitch down both sides.


Six
Pin the shoulders of the front and back together right sides together. Then stitch them together and zigzag back over the edging.


I have no idea why this pictures all fuzzy I am sorry.

Seven
Make your binding tape. I use 1 and 1/2 inches wide strips. 
And attach is to your neck line and both sleeves, You will need some binding for the pockets later.
The easiest why to bind is to open the binding and stitch along the fold at the edge of the fabric, fold over and catch the underside with a stitch.


Eight
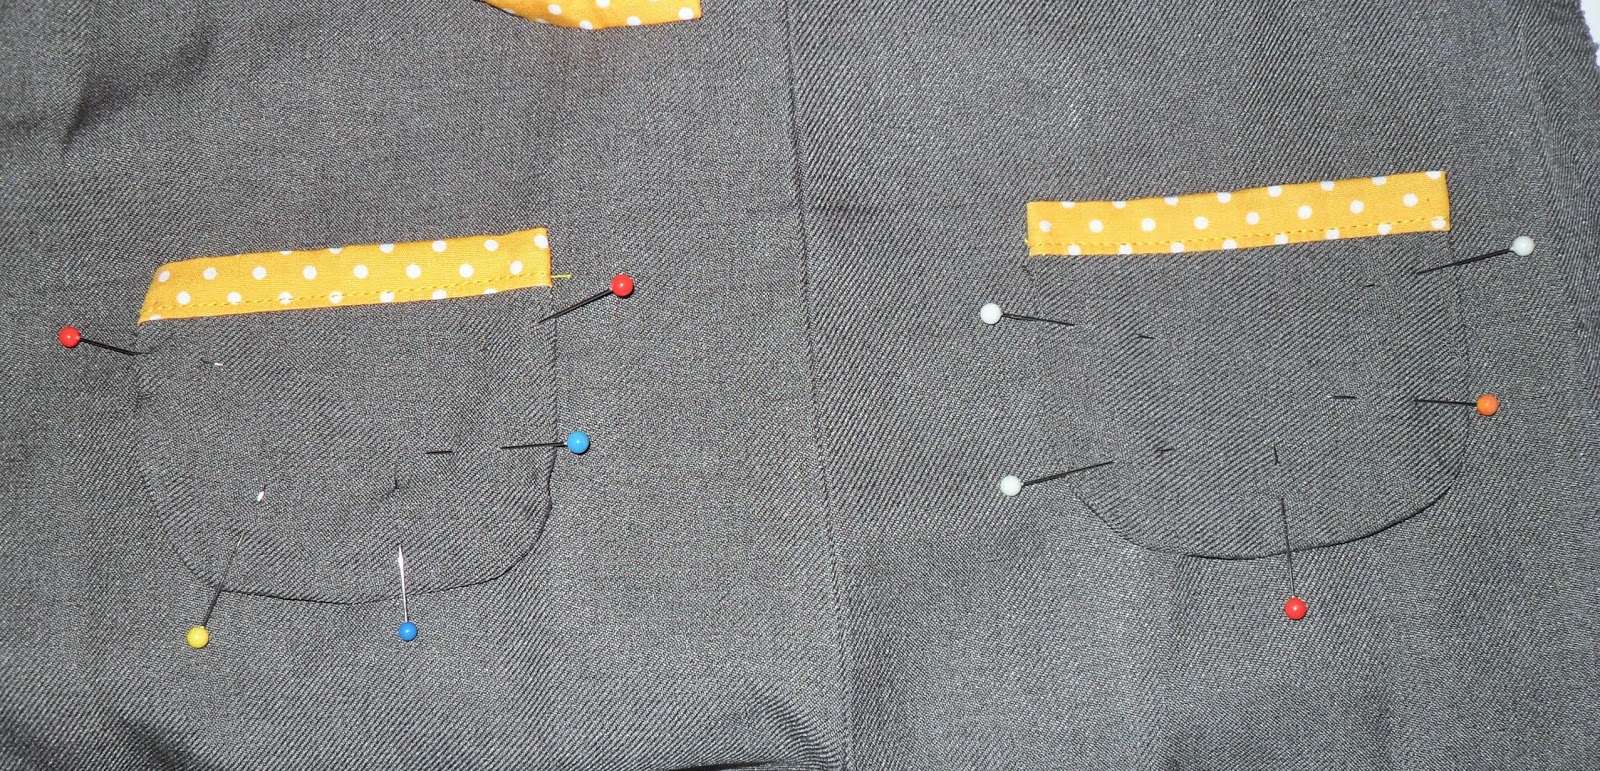
Make yourself a template for the pockets and cut out, remembering your seam allowance, and edge them. Add binding to the top of each pocket.


 Finally sew a gathering stitch around the sides and bottom. Pull gently and gather so that the raw edges pull under. Press with an iron.

Nine
Pin your pockets to your dress and sew on. I used a contrasting colour.


Ten
Attaching the sleeves, I find the middle of the sleeve and match it with the seam on the shoulder. Then pin out each side from the centre. Stitch the sleeves in then zigzag the seam.


So you should look something like this.


Eleven 
Again I don't know what my camera was doing. Anyway pin up your seams starting from the armpit (so you can line up the arm seams). Sew closed I start at the bottom and stop with the needle in the fabric at the arm pit, change direction and see along the arm.


Finally tidy up and you may have guessed it zigzag.


Twelve
Attach your button of choice on the back. 


Thirteen 
Hem the bottom of your dress. I had to pin my hem and then sew it because the fabric didn't crease.


And finally you have FINISHED how exciting....


When small woke up she did a good job of modelling the dress, except she dribbled all over it, teething is so much fun.